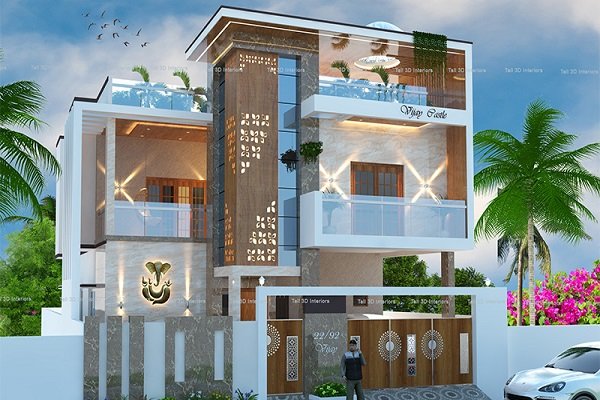
3D Elevation
3D Elevation
3D Elevation refers to the creation of three-dimensional representations of a building's exterior or interior to showcase its design features, proportions, and textures. It is widely used in architectural visualization, real estate, and construction to provide clients and stakeholders with a clear understanding of a design before construction begins.

Steps to Create a 3D Elevation
1. Conceptualize the Design
- Purpose: Determine if the elevation is for residential, commercial, or industrial use.
- Style: Choose the architectural style (e.g., modern, traditional, colonial).
- Details: Decide on key features such as windows, doors, roof styles, and façade elements.
2. Gather Reference Data
- Use 2D floor plans and sectional drawings as a base.
- Collect material specifications, textures, and colors.
3. Choose Software
- 3D Modeling Tools:
- SketchUp (easy and widely used for beginners).
- Autodesk Revit (for BIM and detailed architectural design).
- Blender (free and excellent for rendering).
- 3ds Max (advanced modeling and rendering).
- Rendering Tools:
- Lumion, V-Ray, Enscape, or Twinmotion for photorealistic results.
4. Create the Base Model
- Import or draw a 2D plan into the software.
- Extrude walls, slabs, and other components to create the basic 3D shape.
- Add structural elements like beams, columns, and roof.
5. Add Architectural Details
- Insert windows, doors, and decorative elements.
- Model specific design features, such as balconies, pergolas, or cornices.
- Incorporate natural elements like trees, plants, or water features if applicable.
6. Apply Textures and Materials
- Assign realistic materials to surfaces, including:
- Walls: Concrete, brick, or painted surfaces.
- Glass: Transparent or reflective materials for windows.
- Roofing: Shingles, tiles, or metal finishes.
- Adjust texture scaling and alignment for realism.
7. Set Up Lighting
- Use natural sunlight for outdoor elevations, adjusting the time of day for optimal shadows.
- Add artificial lighting for night renders or interior visibility.
8. Render the Model
- Set up the camera angle to match the desired view (e.g., front, side, or perspective).
- Choose rendering settings:
- High resolution for presentations.
- Photorealistic rendering for client proposals.
- Add post-processing effects (e.g., shadows, reflections, and depth of field).
9. Final Touches
- Include annotations or measurements if needed.
- Add background elements like skies or neighboring buildings for context.
- Ensure the rendering aligns with the project’s aesthetic and functional goals.
Applications of 3D Elevations
- Architectural Visualization: Presenting designs to clients.
- Real Estate Marketing: Showcasing properties before construction.
- Project Approvals: Gaining permits or stakeholder buy-in.
- Interior Design: Visualizing façade and interior features cohesively.
Emerging Trends in 3D Elevation
- Virtual Reality (VR): Allowing immersive walkthroughs of designs.
- Augmented Reality (AR): Overlaying 3D models in real-world environments.
- Parametric Design: Using algorithms for adaptive and complex forms.
Working With The Best
Our Partners


